Appearance
Records Page
Application: https://app.tracki.fi/records
Learn how to effectively manage your time records in Trackifi.
Top Bar Controls


The top bar contains all the main controls for managing your records view.
Calendar Sync (Google Users Only)
- Function: Imports events from your Google Calendar
- Result: Creates draft records with "Default" project
- Note: Only visible if logged in with Google account
Lock/Unlock Month
- Function: Prevents or allows editing of records for the current month
- Purpose: Indicates records are final and ready for invoicing
Show/Hide Schedule
- Function: Toggles display of your work schedule overlay on the calendar
Prefill
- Function: Opens the prefill dialog to quickly create multiple records
- Result: Creates records for a date range with specified project and hours
View Mode Selector
- Dropdown: Shows current mode (Day/Week/Month/Year)
- Function: Switch between different calendar views
- Keyboard: Press M to cycle through views
Time Range Navigation
- Left/Right Arrows: Navigate to previous/next period
- Period Label (e.g., "February 2026"): Click to jump to current week/period
- Keyboard: Use Left/Right arrow keys to navigate, Space to jump to today
View Modes
Trackifi offers four different view modes:
| Mode | Description | Best For |
|---|---|---|
| Day | Single day in detail | Detailed daily tracking |
| Week | All seven days | Day-to-day management |
| Month | Entire month overview | Monthly review |
| Year | Full year overview | Long-term planning |
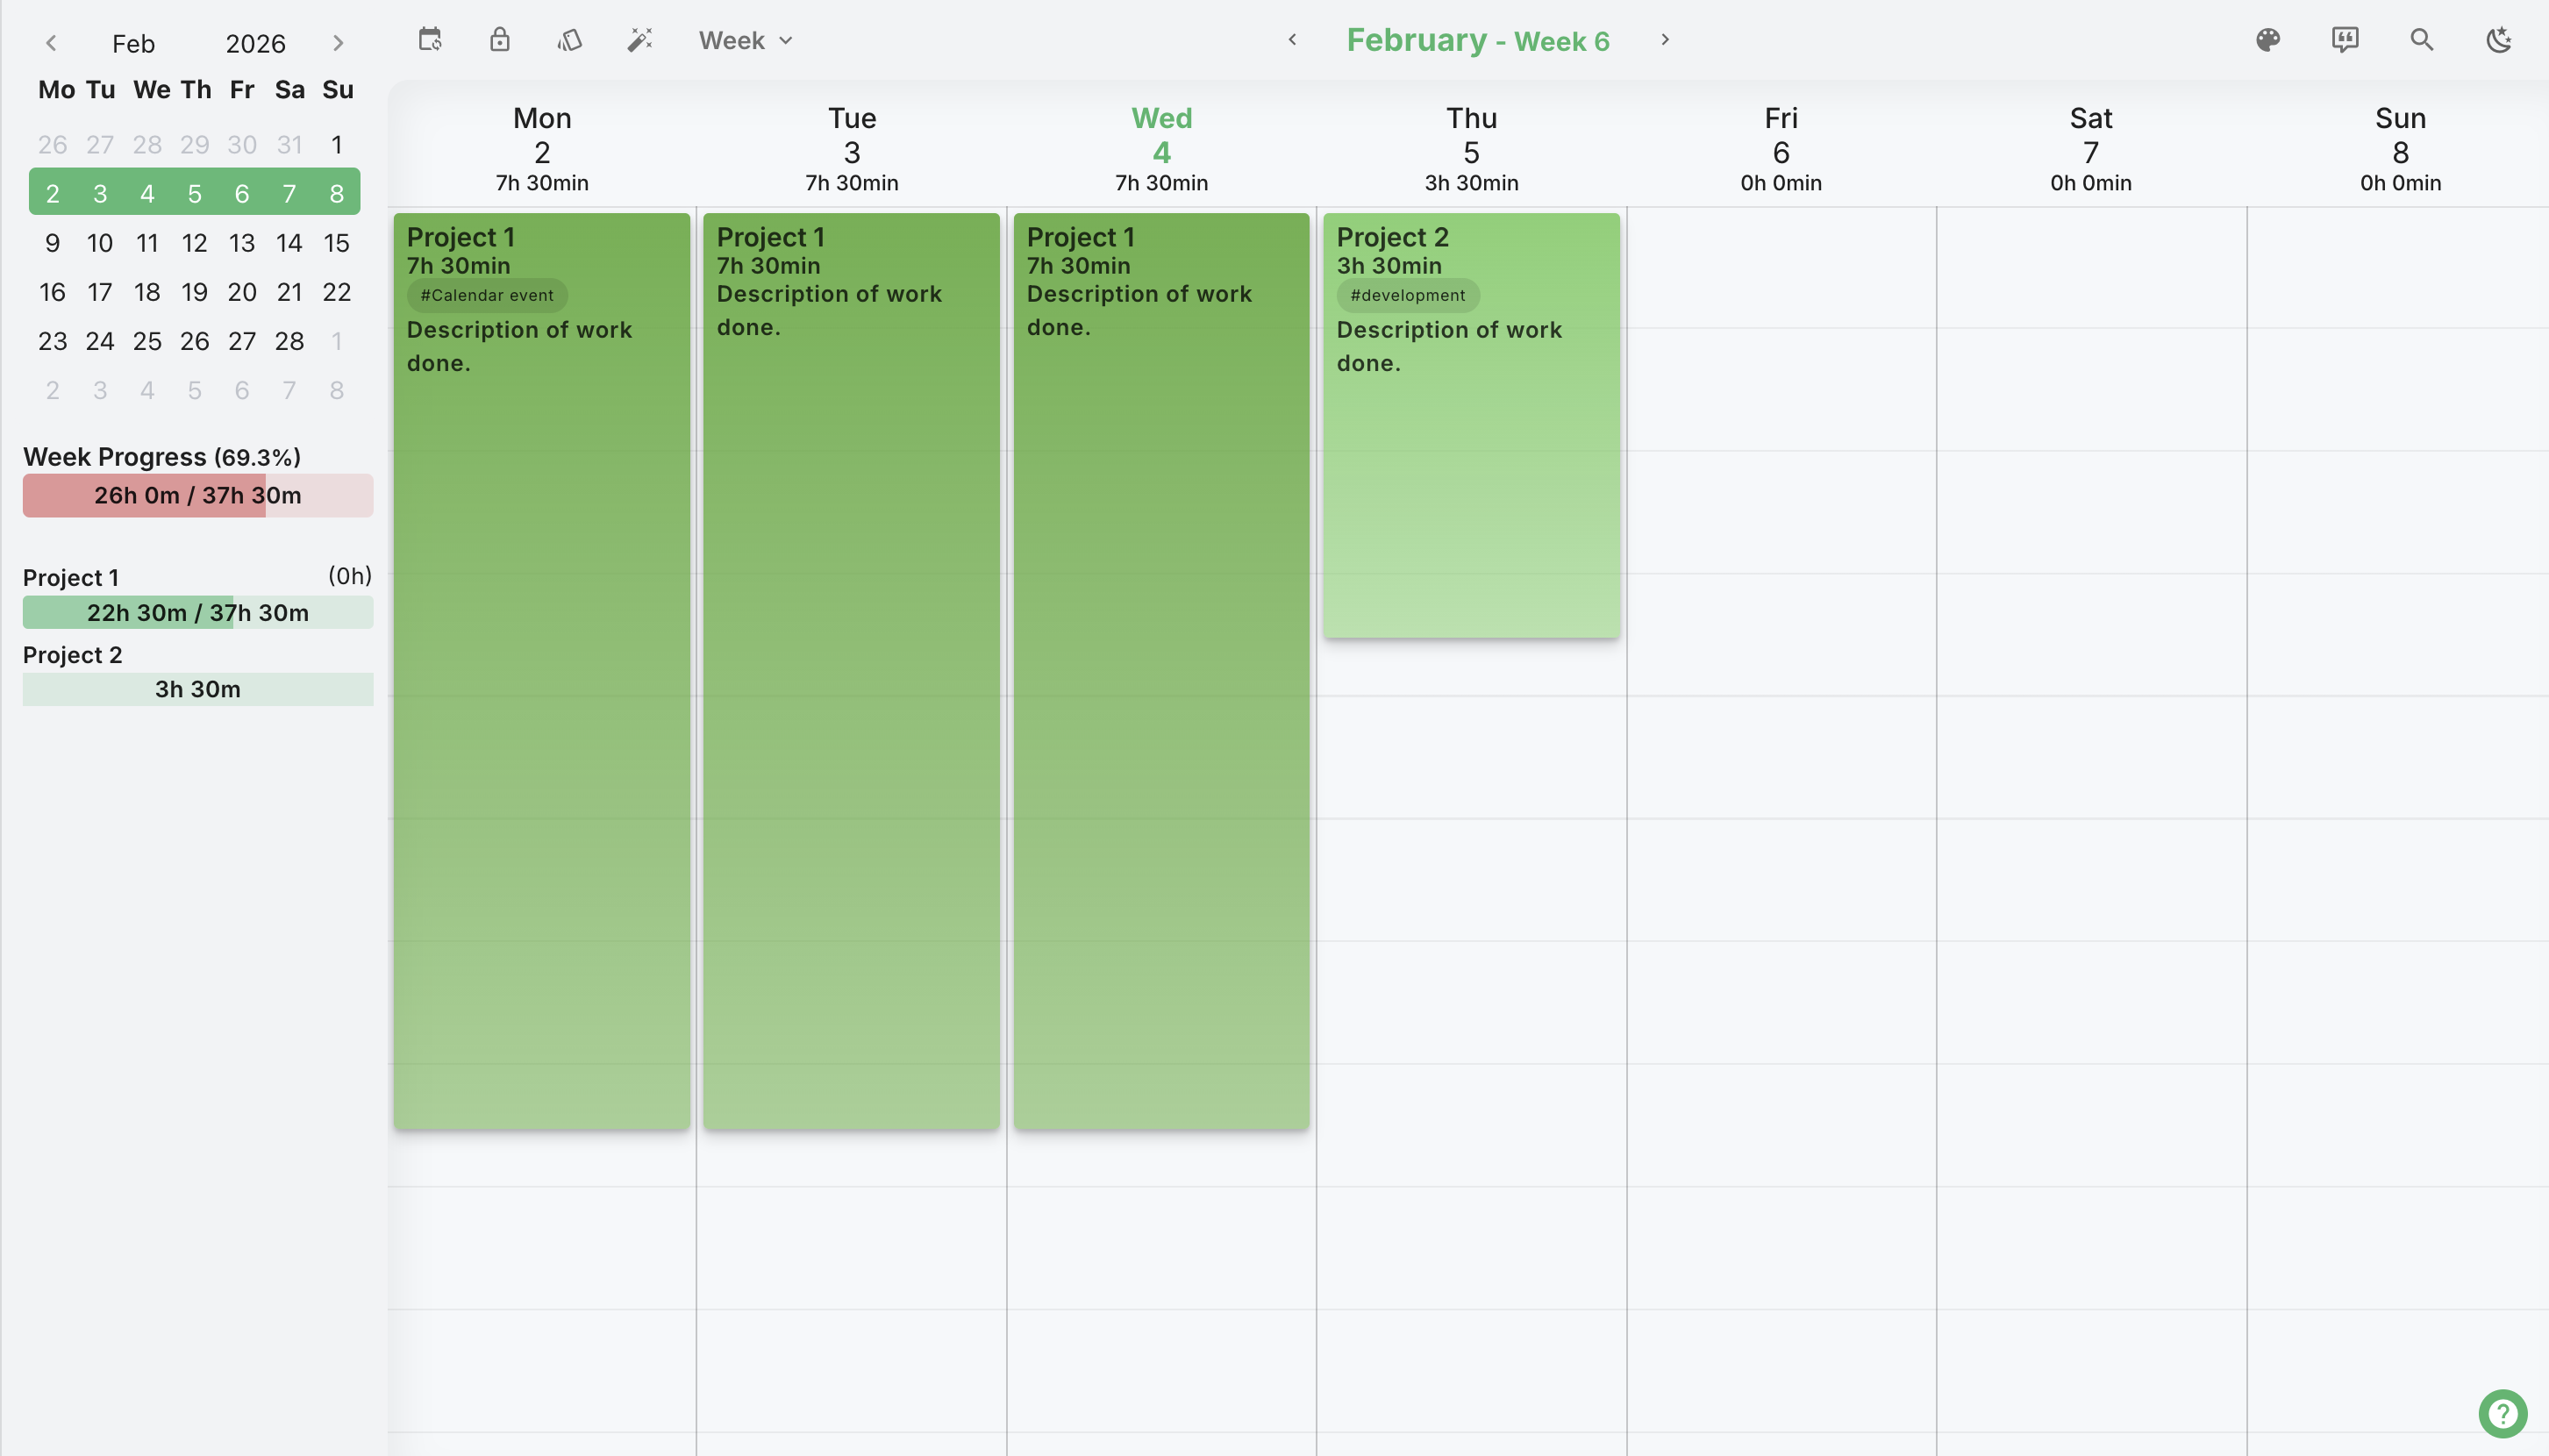
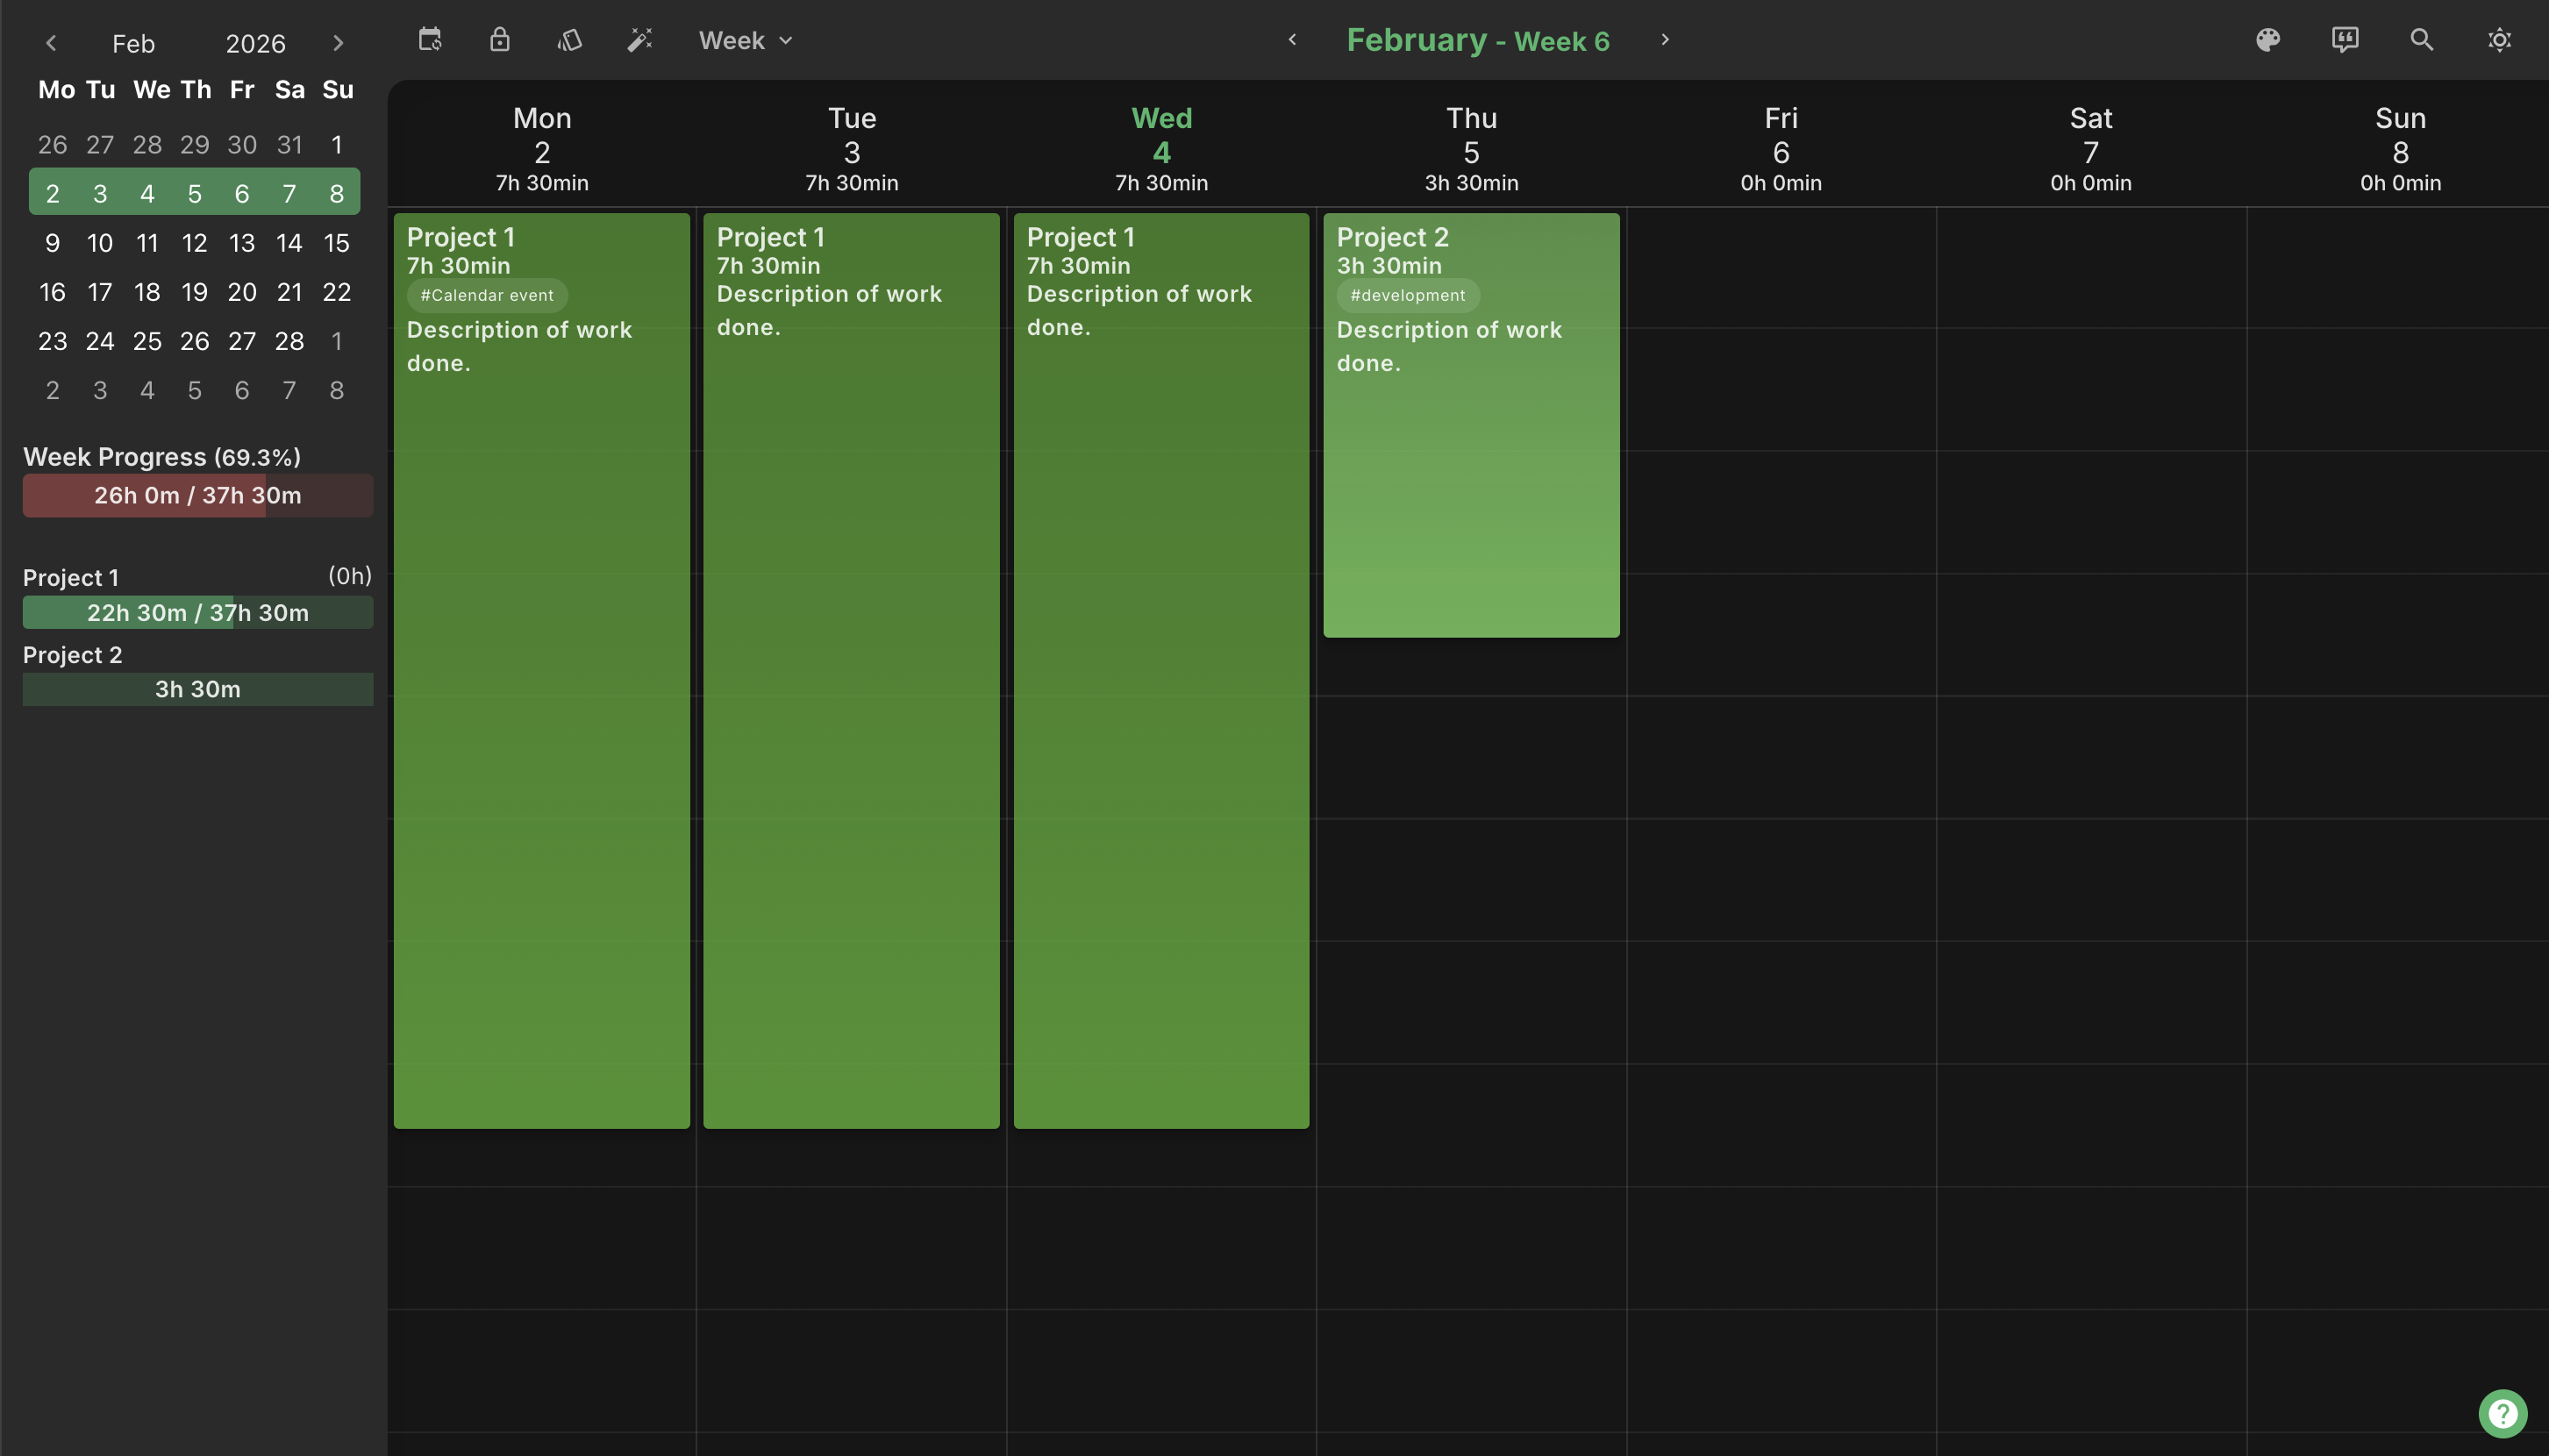
Week View Features
- Drag-and-drop records between days
- Resize records by dragging the bottom edge
- Time column shows start/end times
Month View Features
- Quick overview of work distribution
- Drag and drop records between days
- See monthly progress at a glance
Year View Features
- Identify patterns and busy periods
- Click on a month to zoom in
- Great for annual planning
Creating Records
Quick Creation
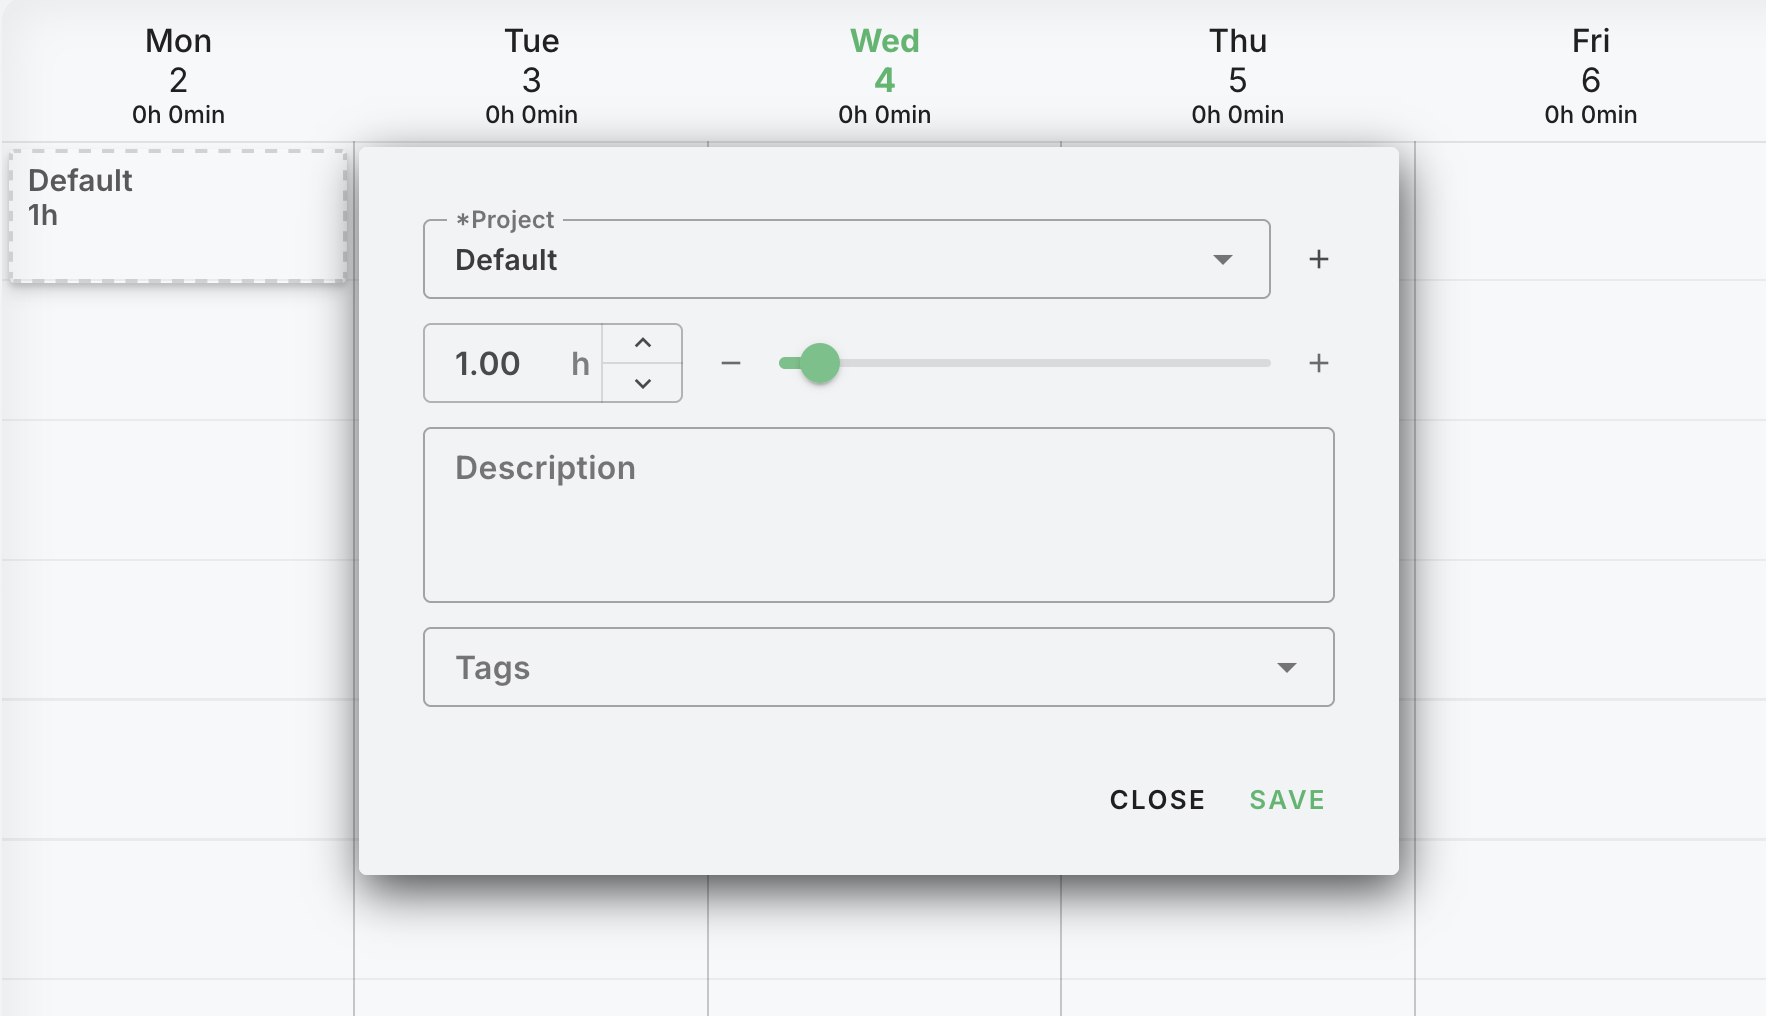
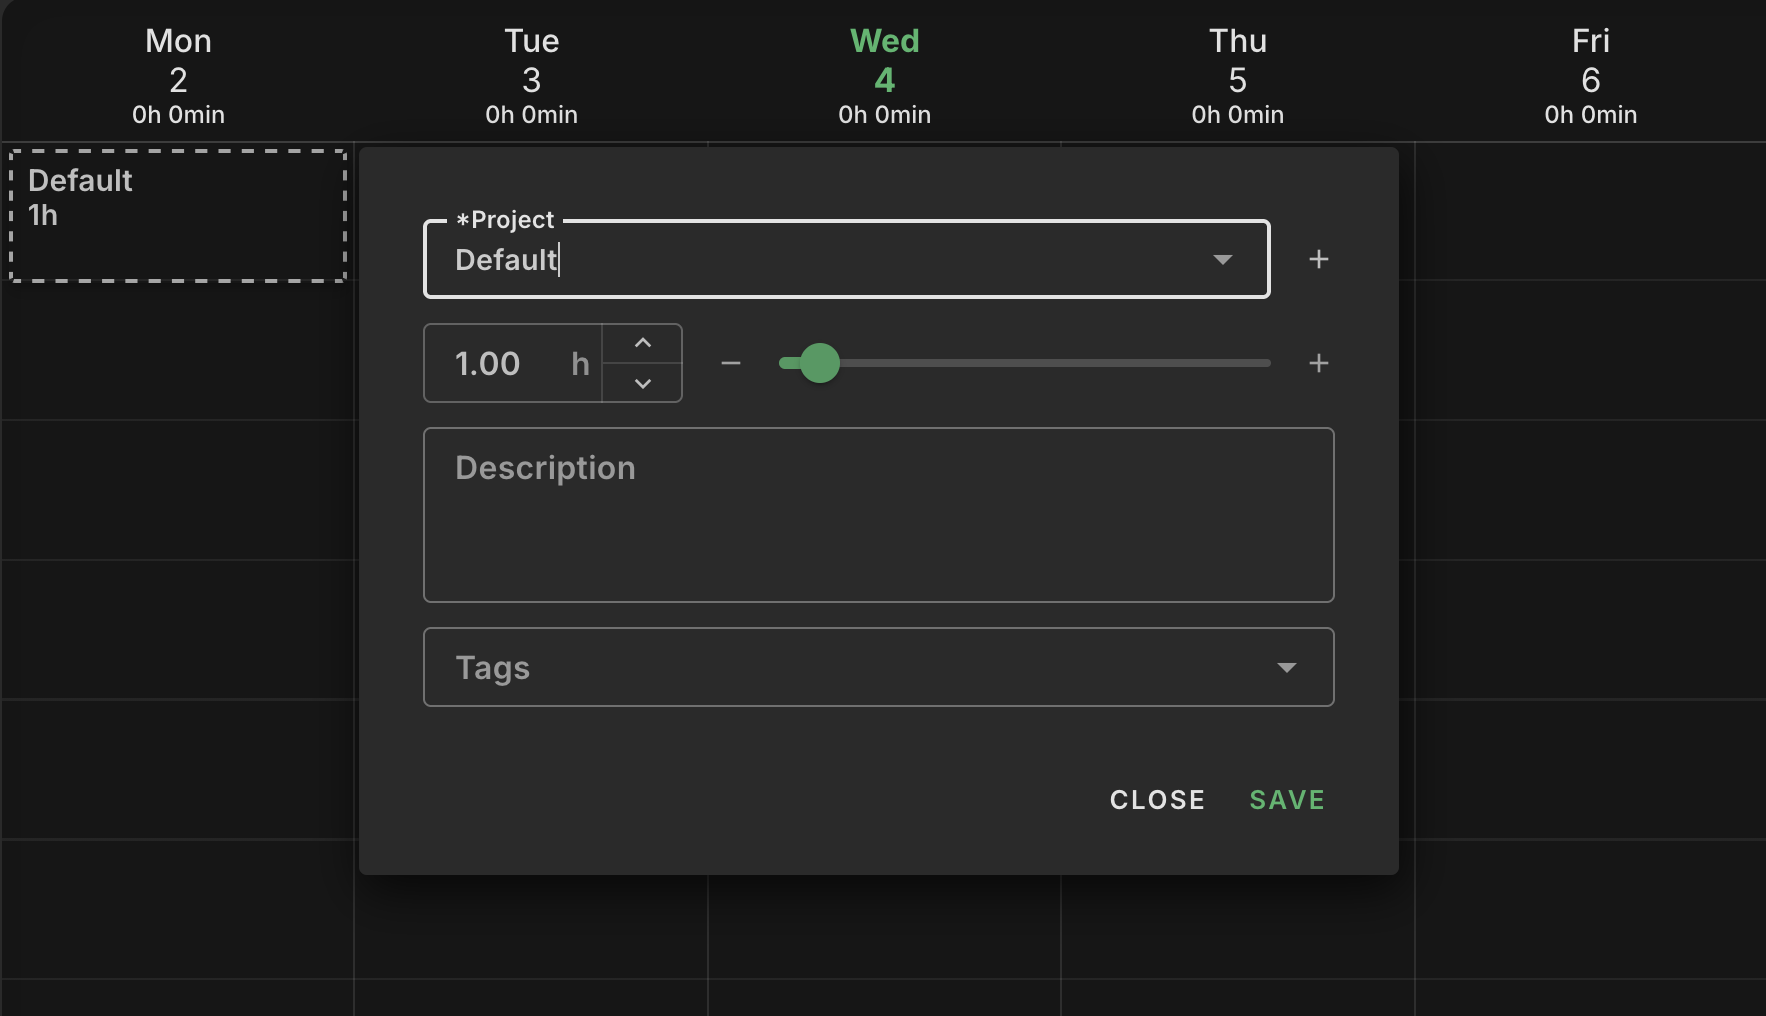
- Click any day column to create a new time record
- Fill in the required and optional details:
- Project (Required) - Select the project you worked on
- Time (Required) - Enter hours worked (default: 1.0 hour)
- Description (Optional) - Brief description of the work
- Tags (Optional) - Categorize for better organization
- Start/End Time (Optional) - For exact time tracking
- Click Save to create the record
Quick Project Selection
- Use the colored project chips below the dropdown
- Projects are ordered by most recently used
Time Entry Options
- Enter total hours directly
- Use +/- buttons to adjust in 15-minute increments
Record Operations
Editing Records
- Click on any existing record to open the edit dialog
- Modify any field and click Save
Resizing Records
- Drag the bottom edge to change duration (week view, desktop only)
- Changes save automatically
Moving Records
- Drag and drop records to move them to different days
- Works in week and month view
Copying Records
- Hold Ctrl + drag to copy a record (desktop only)
- Original record remains in place
Deleting Records
- Method 1: Drag record to trash area (appears when dragging)
- Method 2: Click red trash icon in edit dialog
Creating Absences / Leave
Absence Types
- Vacation
- Sick Leave
- Paid Time Off
- Unpaid Leave
- Parental Leave
- Other
Creating an Absence
- Click any day column to open the record dialog
- In the project dropdown, scroll to "Absences" section
- Select the absence type
- Set the Duration using the date range picker
- Optionally set Time (hours per day for partial absences)
- Click Save
Absence Rules
- Cannot create overlapping absences
- Multi-day absences span across the calendar
- Paid absences count toward work time progress
Prefill Records
Quickly fill in time records for a selected period with default values.
How to Use Prefill
- Click the Prefill button in the top bar
- Select the project and date range
- Configure hours per day and which days to include
- Click Prefill to create the records
Perfect for regular work schedules where you log similar hours each day.
Read more: Prefill Records Documentation
Multi-Select & Bulk Update
Select multiple records and update them all at once using mouse selection.
How to Use Multi-Select
- Click and drag on an empty area to create a selection box
- Release to select all records within the box
- Use the bulk action toolbar to:
- Change project for all selected records
- Update descriptions or tags
- Move records to a different period
- Delete multiple records
Read more: Multi-Select Documentation
Progress Bars & Statistics
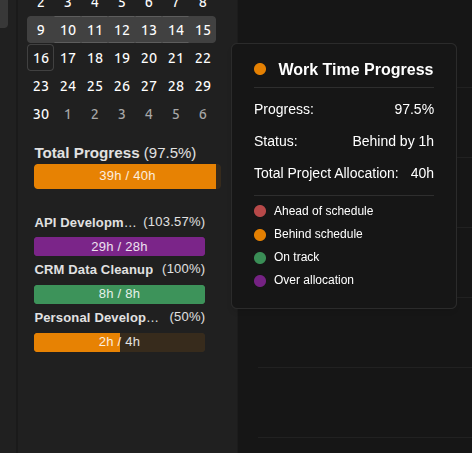
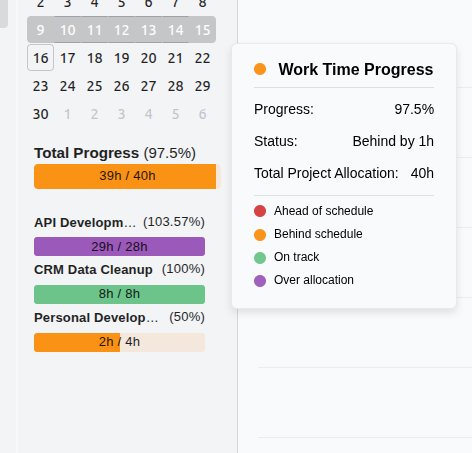
The left sidebar shows your work progress with color-coded indicators:
| Color | Status |
|---|---|
| Green | On track |
| Orange | Behind schedule |
| Red | Ahead of schedule |
| Purple | Over allocation |
Hover over any progress bar for detailed breakdown.
Read more: Progress Bars Documentation
Keyboard Shortcuts
Navigation
| Key | Action |
|---|---|
| Left/Right Arrows | Navigate between periods |
| Space | Jump to current period |
| M | Cycle through view modes |
| S | Toggle schedule display |
Record Creation
| Key | Action |
|---|---|
| T | Create record for today |
| 1-7 | Create record for specific day (Mon-Sun) in week view |
Record Operations
| Key | Action |
|---|---|
| Ctrl + Drag | Copy record to another day |
| Escape | Clear current selection |
Calendar Integration (Google Users)
Setup Requirements
- Must log in with Google account
- Must grant calendar access permissions
Import Options
- Weekly Import: Click calendar sync button to import all week events
- Daily Import: Click calendar icon in day column header
After Import
- Events are imported as draft records
- Default project is set to "Default"
- You must change the project to the correct one
- Review and edit descriptions as needed
Month Lock Feature
Purpose
- Indicates records are complete and final
- Prevents accidental changes
- Signals readiness for invoicing/billing
How to Use
- Complete all time logging for the month
- Click the lock icon in the top bar
- Locked months show a lock icon and prevent editing
Unlocking
- Click the unlock icon to re-enable editing
- Only unlock when changes are necessary
Best Practices
Daily Workflow
- Log time as you work or at end of each day
- Use descriptive descriptions for better tracking
- Tag records consistently for reporting
- Check progress bars to stay on track
Data Quality
- Always select the correct project (not "Default")
- Use consistent tagging conventions
- Double-check time entries for accuracy
Troubleshooting
| Issue | Solution |
|---|---|
| Can't see a project | Contact your manager - you may need assignment |
| Calendar sync not working | Check Google login and permissions |
| Can't edit records | Check if month is locked |